How to wire your Smoothieboard

Introduction
The main goal of this guide is to provide basic electrical knowledge to beginners and to share some useful tips and ideas on how to achieve nice wiring for your machines.
There are thousands of awesome builders around the world with top-notch parts and genius concepts, but when it comes to wiring, a common approach is to hide everything behind some panels and place two zip ties.
While it will surely work, spending a few hours organizing and optimizing your wiring is a win-win.
Your machine will be safer, cleaner, and you won’t even need to hide everything anymore ;).
It can save you time later debugging problems or upgrading parts without rewiring them all the way.
Electricity 101
This section is a basic summary of electricity. It will teach you how to safely wire your machine.
First thing to mention is the fact that there are different electrical laws in different countries.
They can be very (too) strict to irrelevant (dangerous), different units, or different colors.
This guide tries to be as global as possible but don’t take for granted that everything will apply in your country.
If you have any doubts, please refer to your local rules.
Mains
Mains electricity is the general-purpose alternating-current (AC) electric power supply of your house. The nominal voltage is 110V (Volts) for North America, Japan, and a few countries or 230V for most of the rest of the world. Most of our machines run on single-phase power. They should plug into a 3 poles electrical inlet composed of the following:
- L is for live, also known as hot or phase. It carries the alternate current to your house. This is the main source of danger! You should NEVER EVER work on it while plugged. You shouldn’t be able to touch exposed parts connected to L while plugged.
- N is for neutral. It completes the electrical circuit remaining at a voltage in proximity to 0V. The neutral is connected to the ground (Earth), and therefore has nearly the same electrical potential as the earth. This prevents the power circuits from increasing beyond earth voltage, such as when they are struck by lightning or become otherwise charged.
- Earth wire or ground (written GND, P, or PE) connects the chassis of equipment to earth ground as a protection against faults (electric shock).
DC Power
DC power is provided by power supply units (PSUs). Power supplies have input for the mains (L, N, and PE) and a few outputs of DC voltage of a fixed value. Our machines usually use 12V or 24V PSUs. 5V PSUs are often found for electronics. CO2 lasers have their own specific power supply.
DC power at these voltages is not dangerous. You’ll start to feel a small bite at 24V. By the way, you should always work on your electrical components without power because the tiny circuit running on 3.3V isn’t going to like to be touched by mistake by a 24V wire.
Earth Them All!
As seen earlier, earth is for security. In case of default, by example from equipment, a wire breaking, or a screw coming loose, conductive parts of your machine may end connected to live! And there’s no way to detect it until you (or your kids, or your pets) touch it. As we do not like surprise BBQ, there’s a simple way to prevent that: earthing everything. Here are some examples of things to earth:
- Your aluminum extrusion chassis
- Your 230V heated bed support
- The metal sheet enclosure of your laser
Furthermore, earthing those big conductive parts will help with static electrical discharges and prevent them from damaging your brand new Smoothieboard!
Protections
Your house has protection.
They are different according to your local rules.
In case of electrical default, they may be too slow to react so adding a fuse on the mains of your machine is a good idea.
You can buy nice inlets with integrated fuse like this one:

For bigger power, a circuit breaker is a better option as they are quicker to react in case of a problem (the fuse needs to melt). Even quicker, the RCCB (Residual current circuit breaker) will check the currents leaving to and returning from the load and compare them. If the difference is bigger than a fixed threshold (usually 30mA), it will open.
Circuits Handling
Need help ;)
How to Choose Your Wires
Let’s start our tour in the cables jungle. Here are some basic tips about how to choose them. Some simple but nonetheless important notions because cables can overheat and potentially catch fire if they are sized improperly or wear out due to improper strain relief.
Thomas Sandalerer has made a great work resuming this chapter in this video:
Type
Not much choice here, you got to choose between solid-core and stranded wire. Both have their pros/cons:
Solid-core or single-stranded are cheaper to make, stay in shape when bent, and can be used in screw terminals without using ferrules. However, they will fail quickly if used on moving parts as stretching and compressing copper too many times will break it.
Stranded wire are a bit more pricey but they are flexible and therefore more suitable for repetitive movements. However, they don’t keep their shape as well as solid-core so you’ll need a little more cable management to keep everything tidy. It’s also a good idea to use ferrules on them when using screw terminals to keep all the tiny wires together. Make sure any wire you choose to use is actually copper, as the cheaper copper-clad-aluminum wires will break way more easily under stress and fail over time in most connectors. Another good alternative is silicone shielded wire, as used in electric RC cars. It’s a good bit more expensive but is actually a perfect match for the job.
Shielded cables are surrounded by a metallic mesh providing shielding against electromagnetic interference (EMI). They can prevent a power cable, like one on a VFD (Variable-Frequency Drive), from emitting too much noise that could cause issues to other wires around it. Shielding works best to provide protection against EMI on a lower power data line like a USB or Ethernet cable. In our case, shielded cables are not required unless you are running a VFD controlled spindle CNC or high power laser tubes.
Size
Now that you know which type to use, we need to choose a wire size: Wire’s size (cross-section) determines how much current you can safely pass through. An under-sized wire will generate heat and insulation can melt leading to a short circuit or catch fire. When in doubt, one rule: Bigger is safer!
There are different ways to speak of wire’s sizes. The two mains are AWG (for American Wire Gauge) and mm^2^ (metric system). AWG’s notation is followed by a number. Don’t get confused, a greater number indicates a smaller wire diameter and a small number indicates a bigger wire. You can find conversion charts between the two units online but what interests us more is how many amps each size can carry:
| AWG | Maximum amps |
|---|---|
| 24 | 0.577 A |
| 22 | 0.92 A |
| 20 | 1.5 A |
| 18 | 2.3 A |
| 16 | 3.7 A |
| 14 | 5.9 A |
| 12 | 9.3 A |
| 10 | 15 A |
| 8 | 24 A |
| 6 | 37 A |
| mm^2^ | Recommended amps | Maximum amps |
|---|---|---|
| 0.2 | A | A |
| 0.3 | A | A |
| 0.5 | 0.5 A | 1.5 A |
| 0.75 | 2.5 A | 5.0 A |
| 1.0 | 3.0 A | 10.0 A |
| 1.5 | 6.0 A | 15.0 A |
| 2.5 | 15 A | 25 A |
| 4.0 | 20 A | 40 A |
| 6.0 | 25 A | 60 A |
| 10.0 | 40 A | 100 A |
Sources:
- AWG: Powerstream Wire Size
- mm^2^: Hoelzle Cable Cross-sections
As a conclusion and using Thomas’s video tiers:
Tier 1 - sensors, indicators, thermistors, small stepper (less than 1.5A like NEMA17) endstops, computer fans
- can be wired in AWG20 or 0.5mm^2^
Tier 2 - Hotend Heaters, bigger motor (more than 1.5A like NEMA23), Mains of power supply, 230VAC heat pads
- AWG12-18 or 1.5-2.5mm^2^
Tier 3 - low voltage heat pads (12-24VDC) or any current-hungry (high amperage) element
- AWG10 and more or 2.5mm^2^ and more
Color Coding

Color coding your wire is an easy way to identify them later by just looking at them. Color coding is generally ruled by electrical laws of countries. Here’s the most important:
- Brown, black, or grey for Live
- Light blue or white (US) for Neutral
- Yellow-green for Earth
While our machines usually run at 12-24VDC, it’s a good idea to reserve at least the neutral and earth colors. Use at least a color for + and GND of your DC power.
Example of common colors used in Switzerland:
- L1 Brown
- L3 Black
- L3 Grey
- N Light Blue
- PE Yellow/Green
- Lower AC XV Red/Orange
- Lower AC 0V White/Green
- DC+ blue/red
- DC- white/blue
- Analog/digital data lines White/purple/blue/red
More information: Electrical Wiring Color Codes
Wiring Supplies
In this chapter, you will find useful components used in electrical cabinets to achieve nice and clean machines. The idea is to show you what exists on the market and how it’s called so you can source it. You will be able to find these items either online on shops like Aliexpress, Banggood, eBay, etc., or locally from electricians or the best cabinets builders. Again, take this as an insight into how we do things in industrial electrical engineering.
Cable Management
Here are a few things you can use to manage your wires and cables but also pneumatic or water hoses, filament tubes, etc.
Cable Trunking
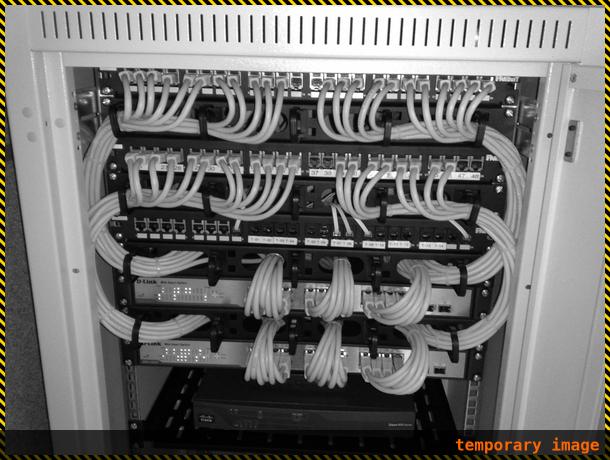

Also called cable ways, cable ducts. The slotted ones are very handy, wires can go in or out where you want. If you have a hot spot full of cables, you can cut some parts to widen the slot. Just cut to length and screw in place. They exist in many sizes of width and height, take some time to choose the right one. 20x20mm fits nicely on 2020 aluminum extrusion. Make sure to use if possible flat head screws or at least with no sharp edges who can damage your wires. The main downside is that you sometimes need to sacrifice space to place them, especially inside electrical cabinets or let’s say the electronics area of your printer.
Mesh Sleeves & Spiral Wrap


Useful to link moving parts over short distances like extruder carriages. They are no brain to use but once in place, it’s not the happiest thing to have to add new wires inside.
Drag Chains

The holy grail for CNC routers but they fit perfectly on smaller 3D printers too. Like wire trunking, they’re available in many sizes by meter(s). Don’t worry if the length is too long for your need. You can just remove some elements until you get the correct length. You will find two types, one closed, the other can be open all the way (to make you happier when adding new wires).
Terminals & Connectors
Terminals

You probably know well terminals as elements on your control board where you connect your wires. I’d like to introduce another type of terminals used in industry to simplify the wiring job. They have a similar function as screw terminals strips: connect circuits together. Where screw terminals have only 2 connection points these industrial terminals can have up to 4 connections points and can be multilevel to save space. They exist in different sizes for different wire sizes. The standard size is up to 2.5mm2 (AWG13) but you can find smaller ones capped for 0.5 or 0.75mm2 (AWG18 or 20), again to save space.
Connection points can either be spring clamps or screws. Screws tend to be the “old” way while clamps are easier, faster, and less prone to wire break (screw over-tightened). Screw connections require crimping ferrules on flex wires.
On the left: 2 level terminal with 3 clamp connection points on each.

Each terminal or terminal’s stage can be bridged with its neighbors (in red on the right). Bridges can be purchased at any special length from 2 to 10 or 20. The longer is the better since you can cut them afterward.
For example, make 2 groups of bridged terminals and use each to distribute power supply + and - easily from a single place and spare you the awful spaghetti-thing going from a component to another to another to… You can do that for every different voltage running on your machine.
Use them as wire interface between the inside and the outside of your control box.
Below: internal cabinets wiring come from the bottom cable way, upper cables go to actuators, sensors, etc.
Crimping Connectors
Crimping connectors are a cheap and easy way to connect our electrical components.
There are many types available.
The most known are Dupont, Molex, or the simple headers as found on Arduino, etc.

The Smoothieboard comes with a complete set of Dupont connectors for the stepper motors, endstops, and thermistors. They require some dexterity to crimp and we strongly advise you to buy a cheap crimping tool on one of your favorite Asian web stores. It will last you a lifetime and save a lot of time (and anger).
- Strip about 2mm of the wire
- Place the pin on the crimping tool, tighten a little
- Place your stripped cable inside the pin, you need to "feel" the correct depth there are two claws on the pin, one who bites the copper, the other the isolation for better protection against traction.
- When in place finish the crimping tool movement.
- You can adjust the tool to crimp more or less the pin by removing the screw and turning the dial on the side (see picture above).
Resources:
Aviation Type
The so-called aviation type connectors are cheap, provide a more solid connection than crimped connectors shown above.
They too are available in many configurations depending on the number of pins and pin size.
Pins need to be soldered, make sure you have a soldering iron.
These connectors make great connectors for controller enclosures, see examples at the bottom of this page.

- Remove the really small screw to open the connector and try not to lose it by replacing it on the black part during your work inside
- Pin numbers are written on the inside and the outside of the black part so no front or back view questions.
- Since it mounts from the outside of the enclosure, make sure to pass your wires through the hole before soldering (seems logical but...no, wait and see)
Tools
Basic:
- Wire stripper
- Precision cutter plier
- Cable cutter
- Ferrules crimper
- Soldering iron & solder
- Screwdrivers 1 to 00
- Multimeter
- Lighter (poor’s heat gun)
- Zip ties
- Heat shrinks
Optional:
- Zip tie gun
- Heat gun
- Crimp